
VBar Control WiFi Sim
Connect a Mikado VBar Control radio to HeliSense over WiFi.
What it is
VBar Control offers a free installable WiFi Sim app that streams your stick and switch positions over a network connection — these are automatically the same assignments that you use for your real-world model helicopters. HeliSense listens for that stream, so your VBar Control becomes the controller for the Trainer and the Simulator.
You’ll need
- A Mikado VBar Control Touch (or newer, including the Evo and Evo+) radio.
- The radio already connected to your WiFi network — under Transmitter Setup › WiFi. The Shop and the sim link both need it.
- Your iPhone, iPad or Mac on that same network (the hotspot on your phone works too).
Installing the app on the VBar Control
You only do this once. If IP UDP Simulator already appears under Applications on your radio, skip to turning it on in HeliSense.
-
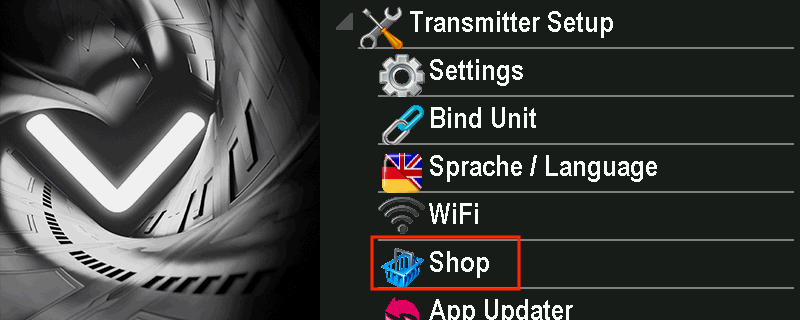
Open the Shop
From the main menu, go to Transmitter Setup › Shop.
-
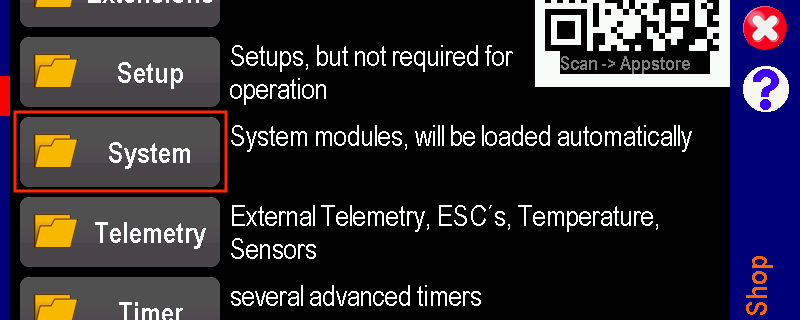
Open the System category
Choose System — “System modules, will be loaded automatically”. The sim link lives here rather than under Setup or Extensions.
-
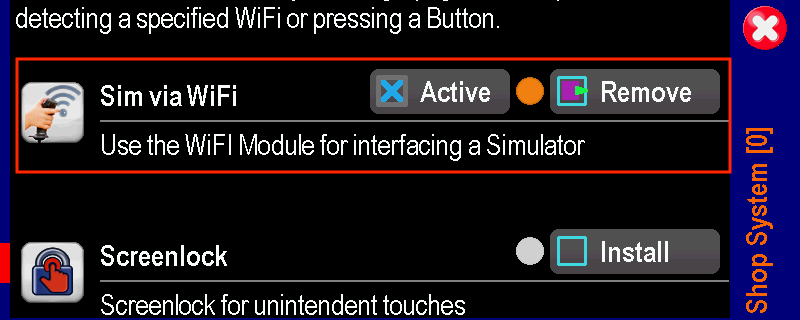
Install “Sim via WiFi”
Find Sim via WiFi — “Use the WiFi Module for interfacing a Simulator” — and tap Install. Once it is installed the row changes to Active and Remove, as shown here.
-
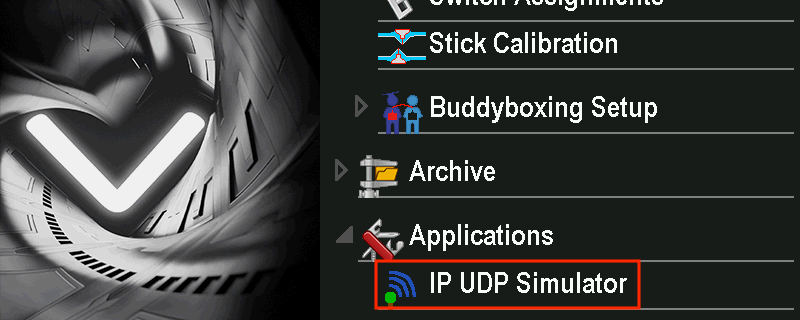
Find it under Applications
Back in the main menu, it now appears as Applications › IP UDP Simulator.
-
Activate it
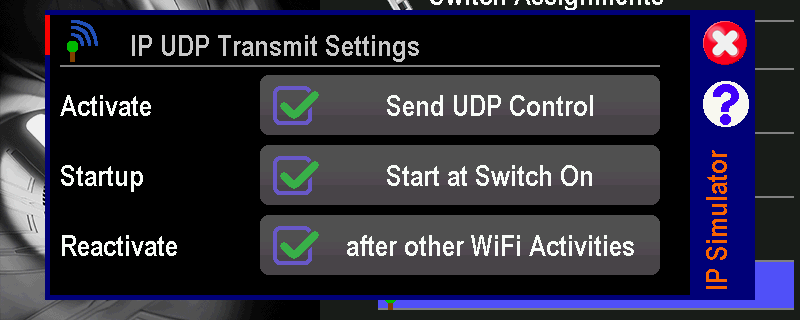
Open it and tick Send UDP Control. Setting Start at Switch On and after other WiFi Activities as well means the radio is ready to fly every time you power it up, with nothing to re-enable.
Turning it on in HeliSense
All that is left is to switch the input on. Your stick axes and switch functions then come across automatically — they are the assignments already set up on the radio for your real helicopters, so there is nothing to map by hand. Only the way you reach the switch differs between the two platforms.
On iPhone and iPad
Open Settings from the gear on the home screen, tap VBar Control WiFi Sim and switch it on. It searches the network and picks up the radio on its own.
On Mac
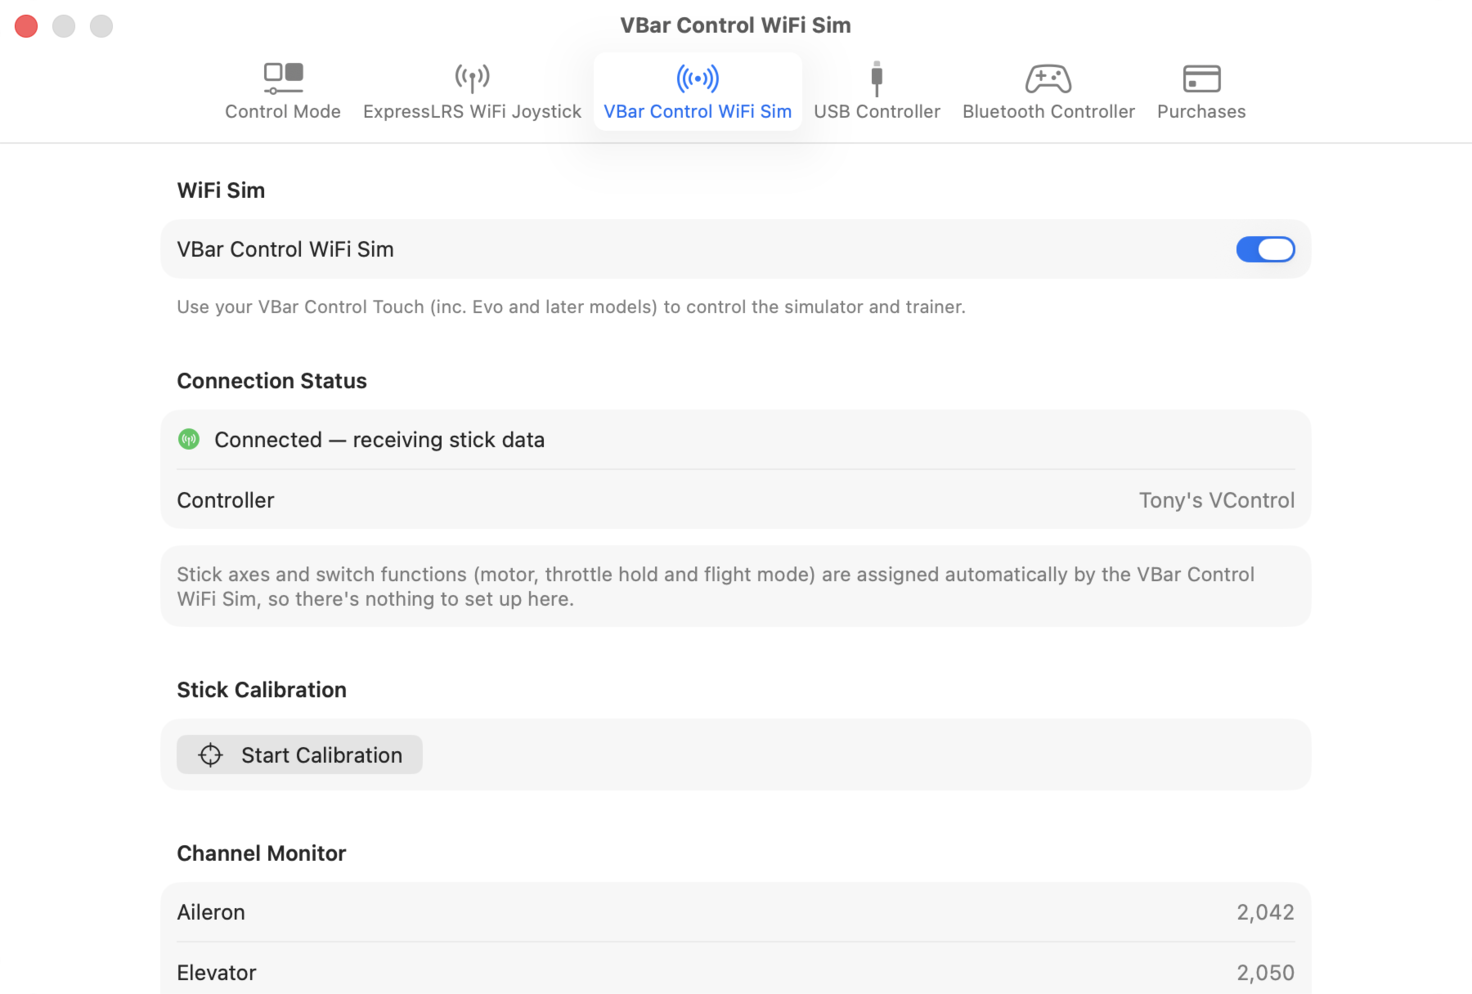
From the menu bar choose Controllers › Controller Setup…, open the VBar Control WiFi Sim tab and turn it on.
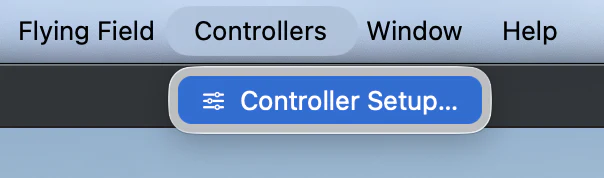
Connection Status then names the radio it has found, and the Channel Monitor below it moves as you move the sticks.
Confirming the link
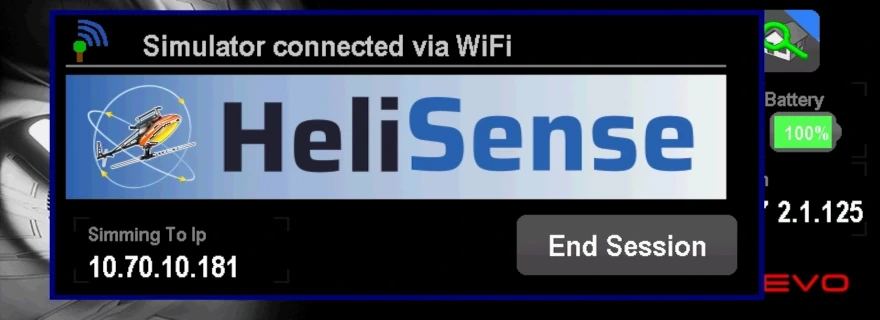
Once a device connects, the VBar Control screen shows the HeliSense branding image and the address it is talking to. That is your confirmation the link is live.
If it doesn’t connect
Nearly always this is the network rather than the radio or the app. Work through these in order.
-
Check both are on the same network
Confirm the VBar Control and the device running HeliSense are both connected. Keep the radio near the router or access point, and the same for the Apple device if it is on WiFi.
If both are on WiFi, putting them on the same network is the option least likely to give problems — rather than, say, the radio on a guest network and the phone on the main one.
-
On a wired Mac, check the subnet
If your Mac is on an ethernet cable, check that it has an IP address in the same subnet as the VBar Control. On a home network you will have to look this up through your router.
On a simple home network — a router supplied by your internet provider, with no advanced configuration — it is highly likely that both devices are on the same subnet. If so, go on to step 3. On a corporate or hotel network you will not be able to check, and the two are likely to be on different subnets: skip to step 4.
-
Restart the link, then the radio
Turn VBar Control WiFi Sim off in HeliSense and back on. If that does not do it, switch the VBar Control off and on again.
If it still will not connect, that points to a configuration or performance problem with the network itself. One thing left to try is the hotspot on your phone: if HeliSense is on the phone, connect the VBar Control to the phone’s hotspot; if HeliSense is on an iPad or Mac, connect that to the hotspot as well.
Your device and the radio may consume mobile data while they are on the hotspot. The stick data itself travels between them locally and does not. -
Send to a fixed IP address instead
If the two are on different subnets, or nothing above has worked, there is still one option that might. By default the VBar Control sends out an IP broadcast message that HeliSense listens for, and a broadcast is only heard by devices on the same subnet. You can point the radio at your device directly instead.
First find the IP address of your Mac or iOS device in its Network or WiFi settings, and note it down. Then open Applications › IP UDP Simulator on the radio again — as in installing the app — and scroll down to the Special Settings section. UDP IP/Port holds the four parts of the address, set by default to the broadcast address 255.255.255.255.
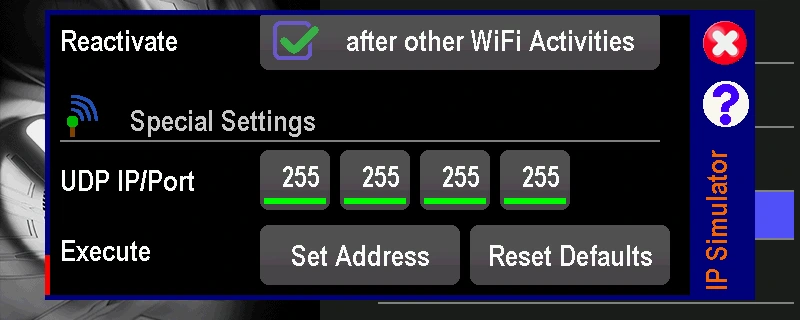
Change those four boxes to the address you noted down and tap Set Address. Here the radio has been pointed at a device on 10.20.0.20.
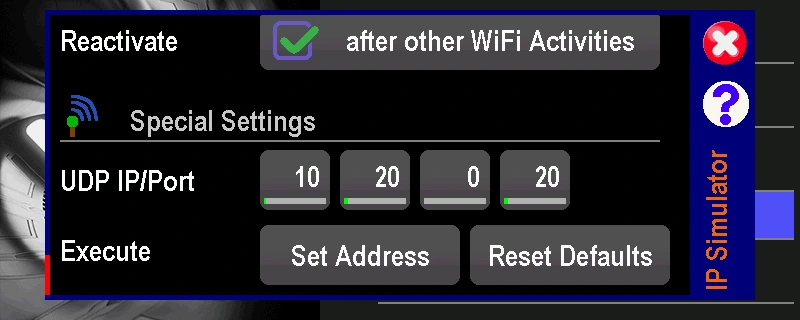
Scroll back up and check the boxes are still ticked as they were in the Activate it step above. The VBar Control now sends the UDP Control message straight to your HeliSense device, provided that address is routable across the network.
Reset Defaults puts the broadcast address back if you want to return to it.
If it works and then stops. A device’s IP address is not fixed — the router can hand out a different one after a reboot, or when the address lease runs out. Check the current address on your Mac or iOS device and update the four boxes if it has changed.
Prefer a different setup? See the full list of controllers.